I decided to gather all the good practices constituting a convenient project setup, tailored especially for SCRUM, but first let’s define what we are aiming for:
- client receives a product increment by the end of every sprint (production build)
- it is easy to build a patched version of the increment without including any source code changes introduced after it’s shipment
- scrum master can easily get access to the most current application version that includes all the features built so far (development build)
- unfinished features are excluded from production and development builds
- there are separate applications for debug, development, production and app store builds
- it is easy to distinguish one from another
- no data is shared between them
- continuous integration server is not needed for building production and development builds
- formula that produces version and build number must give the same results independently of computer it runs on
- it is easy to relate version and build number to the commit application was build from
Source code repository
There is already a git branching model to help us meet first four points. If you are not familiar with GitFlow I would recommend reading this tutorial.
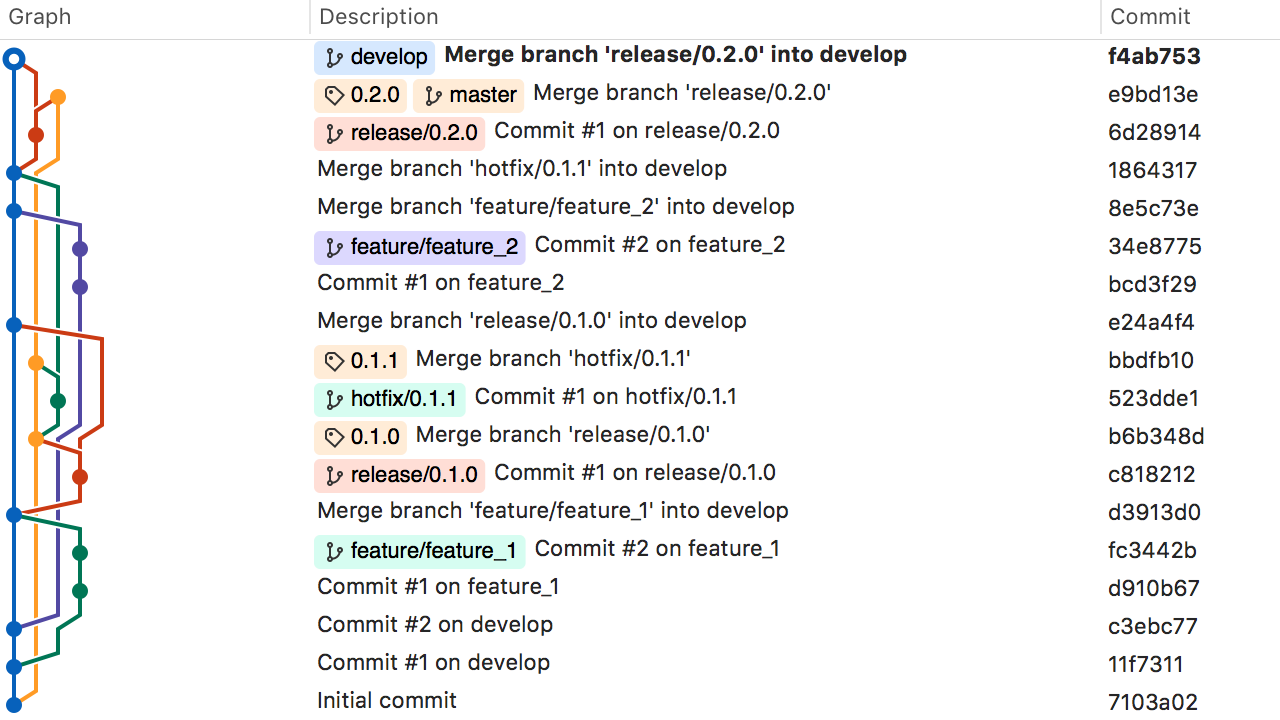
Following image shows an example of a repository using GitFlow. Feature, release and hotfix branches were not removed to make the history easier to follow.

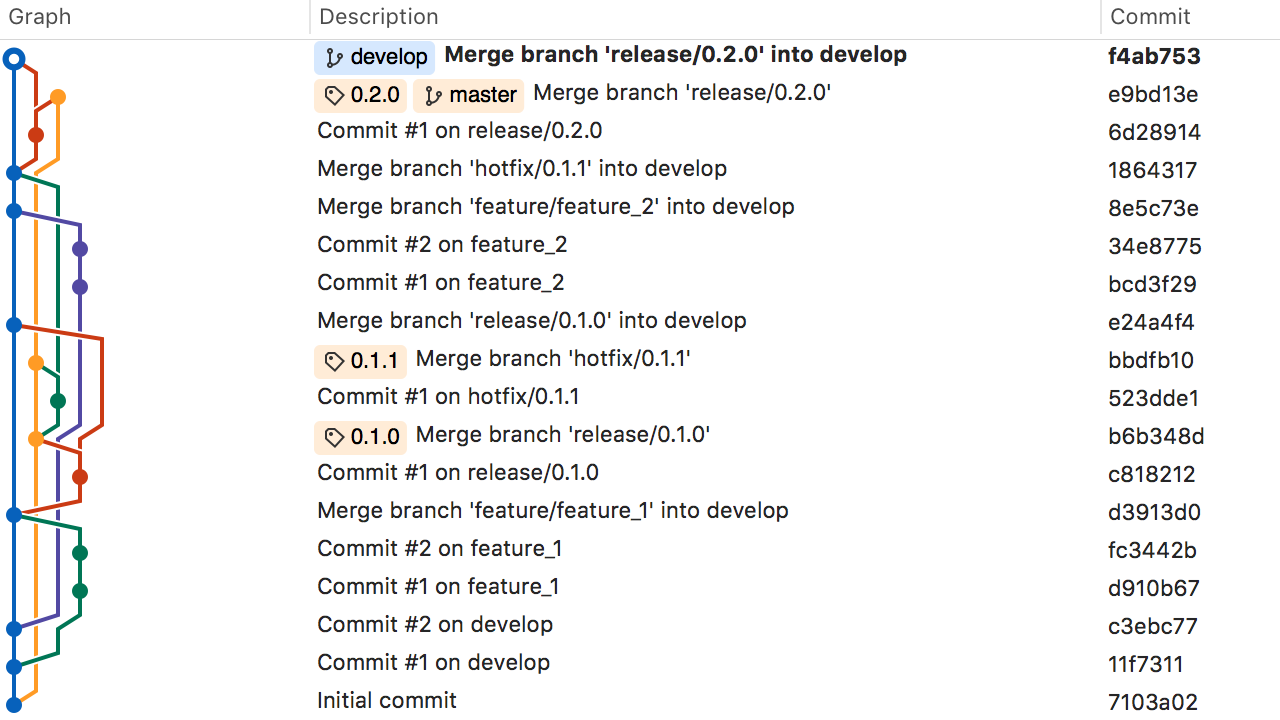
Once we remove unnecessary branches, repository gets cleaner and released version tags more visible.

You can also use a filter to get even clearer view on the develop or master history.


In case you are looking for a good git GUI client with GitFlow support, please check out SourceTree.
Build configurations
Points 5 and 6 can be realized by adding new build configurations (they should be duplicated from Release build configuration).
- Development - built from develop branch, signed with enterprise provisioning profile.
- Production - built from master branch, signed with enterprise provisioning profile.
- App Store - built from master branch, signed with App Store provisioning profile.

Make sure all projects in workspace and sub-projects share the same set of build configurations.
To get separate application for each build configuration we need to provide distincs bundle identifiers.

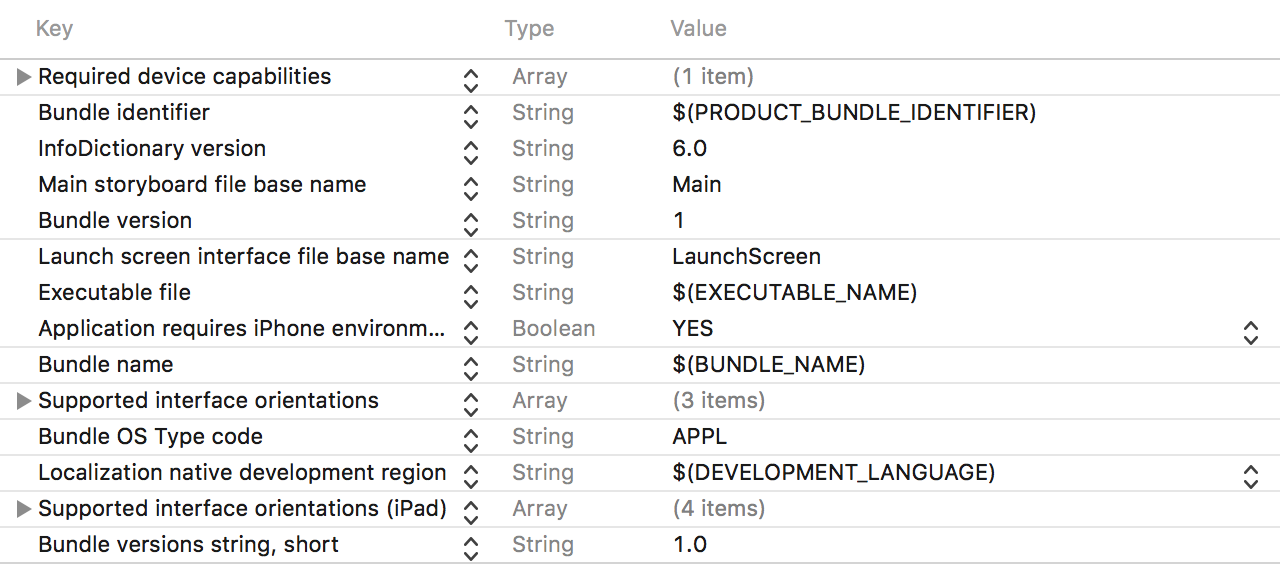
Application name is a bit more complex. First we add user-defined setting BUNDLE_NAME.

Second we place it in Info.plist file under CFBundleName entry.

Despite Xcode uses $(PRODUCT_NAME) for CFBundleName default value it is better not to change PRODUCT_NAME value per build configuration. That would result in changing the name of the binary the target produces. See EXECUTABLE_NAME documentation for more information.
Application icons can also be build configuration dependent. After providing app icon sets for default asset catalog put their names in the following build setting.
![]()
Signing
Make sure you are logged in with your Apple ID to development portal via Xcode and you have downloaded/redownloaded all manual profiles before proceeding.
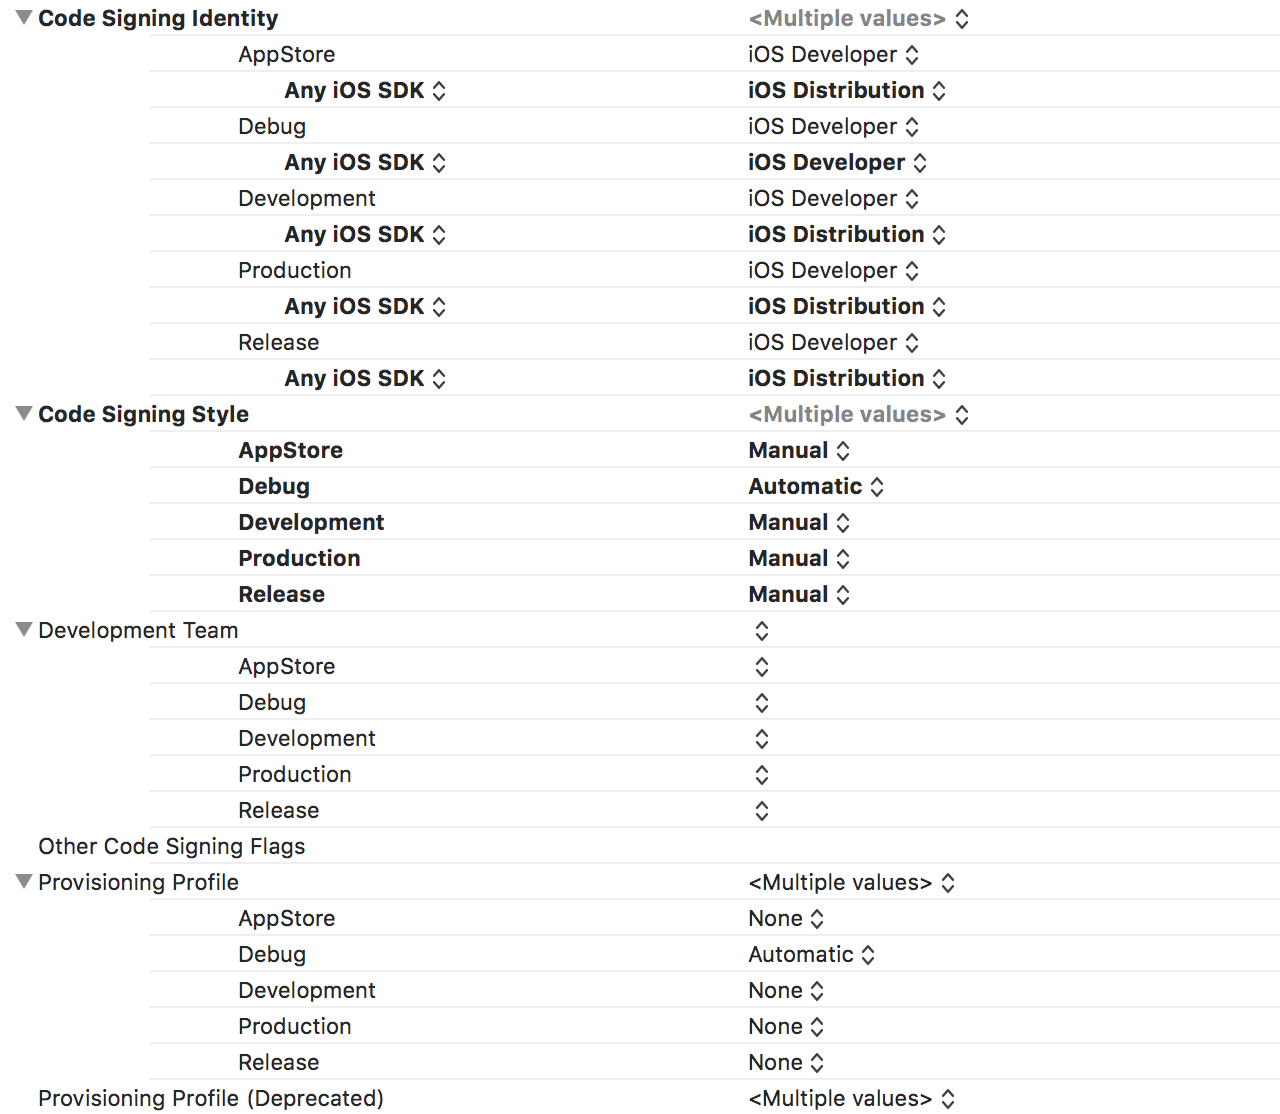
Automatic signing is convenient to use with Debug build configuration. Xcode will generate certificate and provisioning profile for each developer working on the project. We have to use manual signing for the rest: Development, Production and AppStore. Once Code Signing Style is set up we can adjust Development Team and Provisioning Profile sections.

A few advises:
- Enterprise certificates come in pairs. If you happen to have both of them in Keychain Access and your application’s provisioning profile is signed with the older one, the project will fail to build. There are two ways to work around that issue, either resign the provisioning profile with newer certificate or remove it from Keychain Access.
- It is not possible to resign application with provisioning profile and certificate that come from another team.
- Keep enterprise certificate and private key in a separate keychain file, it is easier to manage them in this way.
Automatic Build and Version Numbers
Each release on master branch should be tagged according to semantic versioning standard. The tag is going be used also as application version number (CFBundleShortVersionString). Build number (CFBundleVersion) will be a product of concatenating three integer values:
- number of commits - this value will increment with every new commit on active branch
- commit short SHA in decimal format - will make it easy to find the commit application was build from
- commit build number - will be incremented in case more then one version is built from a commit
For example, for commit f4ab753 we would get 0.2.0 for version number and 16.256554835.0 for build number.
The following script updates version and build number automatically without modifying your working copy.
#!/bin/bash
#======================================================================================
#         FILE: update_plist.sh
#
#        USAGE: update_plist.sh [commit build number]
#
#  DESCRIPTION: Determines version and build number for to the currently
#               checked out commit and updates them in iOS application plist file
#               located in BUILT_PRODUCTS_DIR/INFOPLIST_PATH directory.
#
# REQUIREMENTS: BUILT_PRODUCTS_DIR and INFOPLIST_PATH environment variables.
#               See `PLIST_PATH` variable below.
#
#       AUTHOR: Wojciech Nagrodzki
#     REVISION: 11 March 2018
#======================================================================================

prepare_repository_data_constants() {
    readonly LATEST_TAG_NAME=$(git describe --tags $(git rev-list --tags --max-count=1))
    readonly NUMBER_OF_COMMITS=$(git rev-list HEAD --count)
    local COMMIT_SHA_PRECISION=7
    local LAST_COMMIT_SHA_HEX=$(git rev-parse --short=$COMMIT_SHA_PRECISION HEAD)
    readonly LAST_COMMIT_SHA_DEC=$((0x$LAST_COMMIT_SHA_HEX))

    echo "LATEST_TAG_NAME=$LATEST_TAG_NAME"
    echo "NUMBER_OF_COMMITS=$NUMBER_OF_COMMITS"
    echo "LAST_COMMIT_SHA_HEX=$LAST_COMMIT_SHA_HEX"
    echo "LAST_COMMIT_SHA_DEC=$LAST_COMMIT_SHA_DEC"
}

update_version_number() {
    echo "Set $LATEST_TAG_NAME for CFBundleShortVersionString"
    $PLISTBUDDY -c "Set :CFBundleShortVersionString $LATEST_TAG_NAME" "$PLIST_PATH"
}

update_build_number() {
    local BUILD_NUMBER="$NUMBER_OF_COMMITS.$LAST_COMMIT_SHA_DEC.$COMMIT_BUILD_NUMBER"
    echo "Set $BUILD_NUMBER for CFBundleVersion"
    $PLISTBUDDY -c "Set :CFBundleVersion $BUILD_NUMBER" "$PLIST_PATH"
}

readonly COMMIT_BUILD_NUMBER=${1:-0}
readonly PLIST_PATH="$BUILT_PRODUCTS_DIR/$INFOPLIST_PATH"
readonly PLISTBUDDY="/usr/libexec/PlistBuddy"

prepare_repository_data_constants
echo "Updating version and build number in plist file: $PLIST_PATH"
update_version_number
update_build_number
It should be executed in target build phase.

Official documentation is not consistent in how CFBundleShortVersionString and CFBundleVersion should look like. Basing on my experience both numbers should be incremented with every new version, failure to do so will result in rejecting the binary by iTunes Connect portal. See Technical Note TN2420 for more details.
Building
The fore-mentioned setup allows us to use Xcode archive command to build application with any build configuration we choose. This way we can build and deliver the application increment even if CI system breaks.
It is also easy to integrate the setup with Xcode bots, Fastlane, Jenkins and Travis.

